Dockerfile 명령어

* 베이스 이미지
커널이 없고, 단순히 실행 파일들, 실행 명령어(apt, yum ...)들만 정의된 일종의 폴더이다.
ADD - tar과 유사함. 외부에 있는 tar파일을 도커 이미지 내부에 넣는 작업.
tar를 풀 수 있음
USER - root대신 일반 사용자로 접근할 때. 자주 사용되지는 않음
test 디렉터리를 만든 후 들어가서 도커파일을 만든다.
vi Dockerfile
FROM ubuntu:18.04
MAINTAINER johnlee
LABEL "name"="webserver"
ENV aloha=date
ENV path=/var/www/html
RUN sed -i 's/archive.ubuntu.com/ftp.daumkakao.com/g' /etc/apt/sources.list
RUN apt-get update
RUN apt-get install apache2 -y
COPY nihao /var/www/html/nihao
# 니하오 폴더 만들기
COPY hello.html $path
ADD aws.tar /var/www/html
# 아카이빙된 파일을 푼다.(tar만 가능)
WORKDIR /var/www/html
# cd, exec -it 의 의미
RUN echo ohayo >> ohayo.html
VOLUME /var/www/html
# /tmp:/var/www/html? 호스트 폴더를 지정할 수 없어서 컨테이너 경로만 지정한 것.
EXPOSE 80
# 80: 포트에 대한 정보
ENTRYPOINT ["apachectl"]
# apachectl이 반드시 구동되어야 한다. 이미지를 다운받은 사람이 명령어를 수정하지 못하도록 한다.
CMD ["-D", "FOREGROUND"]
# 사용자가 마음대로 명령어를 바꿀 수 있다.
 mkdir nihao
vi nihao/index.html
echo "NIHAO" > nihao/index.html
echo "HELLO" > hello.html
aws.tar파일을 root/test 디렉터리에 옮긴다.
docker build -t hyun141/hello:v1.0 .빌드한다.

끝에 Successfully build 가 뜨면 성공적으로 완료된 것.

생성되어 있다.

그 다음 repo에 push한다.
digest가 뜨면 성공
만약 access denied가 뜬다면 login을 해야 한다.

호스트 포트는 49153 : 랜덤으로 설정된다.


잘 접속된다.
도커파일 만들기

homepage라는 디렉터리를 만든 후, 간단한 정적 웹사이트를 만든다.

tar 파일을 만든다.
vi Dockerfile
FROM nginx:latest
ADD test.tar /usr/share/nginx/html
CMD ["nginx", "-g", "daemon off;"]

build - push - run 한다.
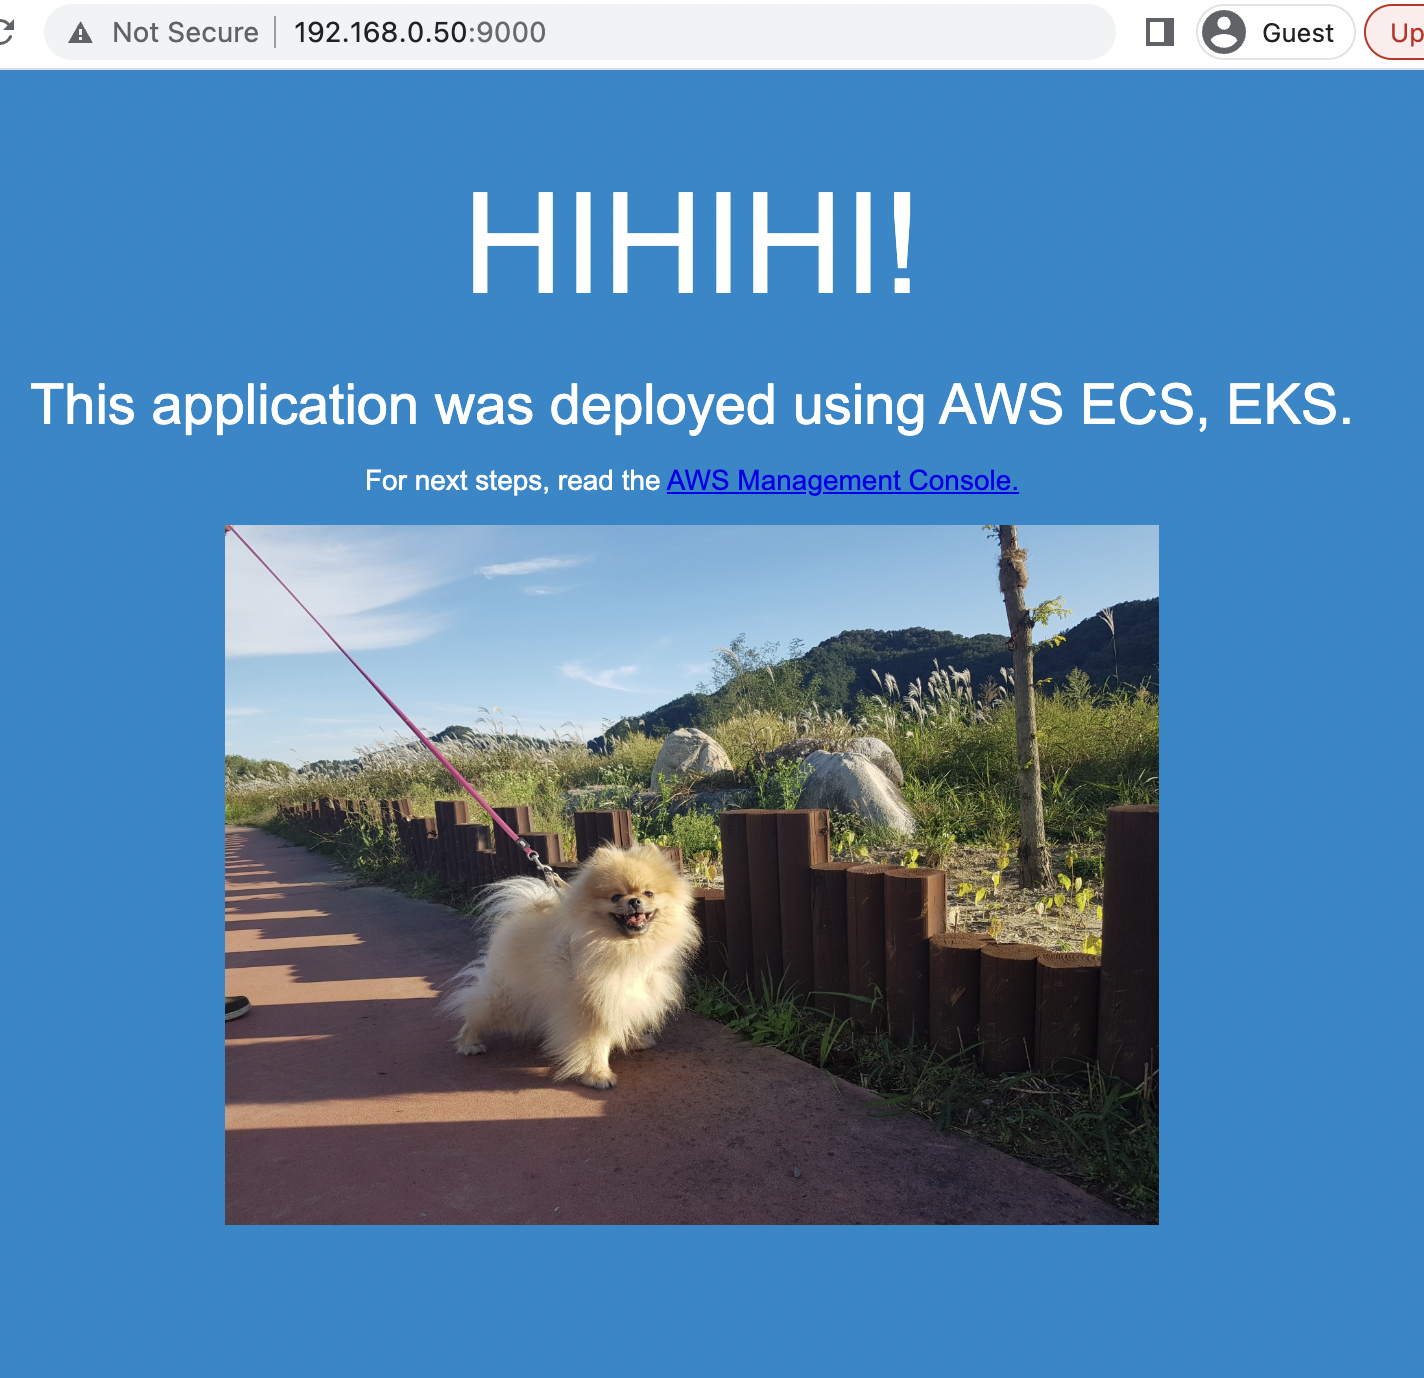
docker run -d -p 9000:80 --name home hyun141/homepage:v1.0expo가 없기 때문에 바로 이미지를 실행시킬 수 없다.
따라서 -p 를 이용하여 포트번호를 준다.

Dockerfile을 이용해서 Wordpress 구축하기
wordpress 디렉터리를 만든 뒤, Dockerfile을 생성한다.
vi Dockerfile
FROM centos:7
MAINTAINER test@gmail.com
RUN yum install -y httpd php php-mysql php-gd php-mbstring wget unzip
RUN wget https://ko.wordpress.org/wordpress-4.8.2-ko_KR.zip
WORKDIR /var/www/html
RUN unzip /wordpress-4.8.2-ko_KR.zip
RUN mv wordpress/* .
RUN chown -R apache:apache /var/www
CMD httpd -DFOREGROUND
Dockerfile의 시작은 무조건 FROM부터
docker image build -t hyun141/wordpress:v1.0 .
docker push hyun141/wordpress:v1.0
docker container run -d -p 88:80 --name wordpress hyun141/wordpress:v1.0
그 다음
 docker run -d -p 3306:3306 --name dbserver \
-e MYSQL_DATABASE=wordpress \
-e MYSQL_USER=wpuser \
-e MYSQL_PASSWORD=wppass \
-e MYSQL_ROOT_PASSWORD=password mariadb
도커 데이터 관리
[root@localhost volume]# mkdir bm01
[root@localhost volume]# touch bm01/tst.txt
[root@localhost volume]# ls bm01
tst.txt
[root@localhost volume]# docker run -itd --name bm-test -v ~/bm01:/mnt centos:7
cf192eefd3e375d9d0ef3720380635b018924d1bbb2dd562518866666ee5d57d
[root@localhost volume]# docker exec bm-test ls /mnt
[root@localhost volume]# docker rm -f bm-test
bm-test
[root@localhost volume]# docker run -itd --name bm-test -v /root/volume/bm01:/mnt centos:7
5b07e940c95754c1f889160aa78ebbba7c129974461498938e6c8c9a9725bce1
[root@localhost volume]# docker exec bm-test ls /mnt
tst.txt
[root@localhost volume]# cd bm01/
[root@localhost bm01]# echo hello > hello.txt
[root@localhost bm01]# docker exec bm-test ls /mnt
hello.txt
tst.txt
run: 실행시키기
exec : 실행중인 컨테이너에다 실행시킨다.
[root@localhost bm01]# docker volume create my-vol01
my-vol01
[root@localhost bm01]# docker inspect my-vol01
[
    {
        "CreatedAt": "2022-07-12T14:15:15+09:00",
        "Driver": "local",
        "Labels": {},
        "Mountpoint": "/var/lib/docker/volumes/my-vol01/_data",
        "Name": "my-vol01",
        "Options": {},
        "Scope": "local"
    }
]
create로 만든 디렉터리는 dockere volume 명령어로 관리할 수 있다.
[root@localhost bm01]# docker run -itd --name vol-test -v my-vol01:/mnt centos:7
c5a4d67d89c1b9535150ada409a3651966b02695c5575ba60ab3714333c4afa8
[root@localhost bm01]# docker run -itd -p 801:80 --name vol-web -v my-vol01:/usr/local/apache2/htdocs:ro httpd:latest
Unable to find image 'httpd:latest' locally
latest: Pulling from library/httpd
461246efe0a7: Pull complete
d6bc17b4451a: Pull complete
72dcd3e40e39: Pull complete
c332ae8365a7: Pull complete
97f4b88189d8: Pull complete
Digest: sha256:454cca1249b5009f0bd9e749083b5edb91b25cda2ed6e3e0c147aa5459c508bf
Status: Downloaded newer image for httpd:latest
fec1196d68340a4c03c6858fbe44ccbcb81ce01fb08c1c4f7bf62e921a33bf64
[root@localhost bm01]# curl 192.168.0.50:801
<html><body><h1>It works!</h1></body></html>
vol-web : 웹서버의 컨테이너
아파치 서버가 설치되고, 그 경로에 마운트된다.

[root@localhost bm01]# docker exec vol-test sh -c "echo "Nihao" > /mnt/index.html"
[root@localhost bm01]# curl 192.168.0.50:801
Nihao
볼륨 삭제하기
[root@localhost bm01]# docker volume rm my-vol01
Error response from daemon: remove my-vol01: volume is in use - [c5a4d67d89c1b9535150ada409a3651966b02695c5575ba60ab3714333c4afa8, 3821ef7392e5ce40d9e96a2b023117619293cc45dfd289c7364c520a946f59f9, 91d6a0a7183b3c3c34384569e3d890da2564f83ebf2f0d52bbc693d4eb975333]
[root@localhost bm01]# docker rm -f vol-web
vol-web
[root@localhost bm01]# docker volume rm my-vol01
Error response from daemon: remove my-vol01: volume is in use - [c5a4d67d89c1b9535150ada409a3651966b02695c5575ba60ab3714333c4afa8, 91d6a0a7183b3c3c34384569e3d890da2564f83ebf2f0d52bbc693d4eb975333]
[root@localhost bm01]# docker rm -f vol-test
vol-test
[root@localhost bm01]# docker volume rm my-vol01
Error response from daemon: remove my-vol01: volume is in use - [91d6a0a7183b3c3c34384569e3d890da2564f83ebf2f0d52bbc693d4eb975333]
[root@localhost bm01]# docker rm -f vol-web1
vol-web1
[root@localhost bm01]# docker volume rm my-vol01
my-vol01
사용중일 때 삭제가 안되기 때문에, 연결된 볼륨들을 삭제한 뒤 삭제할 수 있다.
도커 네트워크 관리
later
Onbuild 명령어 활용
<Operator - CentOS에서>
[root@localhost ~]# mkdir onbuild && cd $_
[root@localhost onbuild]# vi Dockerfile.base
Dockerfile.base
FROM ubuntu:16.04
RUN sed -i 's/archive.ubuntu.com/ftp.daumkakao.com/g' /etc/apt/sources.list
RUN apt-get -y update
RUN apt-get -y install nginx
EXPOSE 80
ONBUILD ADD website*.tar /var/www/html/
CMD ["nginx", "-g", "daemon off;"]
그리고 Dockerfile 을 만든다.
vi Dockerfile
FROM hyun141/web-base:v1.0
파일 명을 Dockerfile과 다르게 할 때는 -f 옵션을 이용한다.
[root@localhost onbuild]# docker build -t hyun141/web-base:v1.0 -f Dockerfile.base .
Sending build context to Docker daemon  3.072kB
Step 1/7 : FROM ubuntu:16.04
 ---> b6f507652425
Step 2/7 : RUN sed -i 's/archive.ubuntu.com/ftp.daumkakao.com/g' /etc/apt/sources.list
 ---> Using cache
 ---> 47a076758a37
Step 3/7 : RUN apt-get -y update
 ---> Using cache
 ---> eacdac4a02df
Step 4/7 : RUN apt-get -y install nginx
 ---> Using cache
FROM hyun141/web-base:v1.0
 ---> 9841be09461c
Step 5/7 : EXPOSE 80
 ---> Using cache
 ---> 2e37bb9fa5ed
Step 6/7 : ONBUILD ADD website*.tar /var/www/html/
 ---> Using cache
 ---> cb65db4dab66
Step 7/7 : CMD ["nginx", "-g", "daemon off;"]
 ---> Using cache
 ---> 1ef2a46d5851
Successfully built 1ef2a46d5851
Successfully tagged hyun141/web-base:v1.0
[root@localhost onbuild]# docker push hyun141/web-base:v1.0
\The push refers to repository [docker.io/hyun141/web-base]
d4fe60f34be0: Pushed
f48128be92a0: Pushed
ee14f35430fd: Pushed
1251204ef8fc: Mounted from library/ubuntu
47ef83afae74: Mounted from library/ubuntu
df54c846128d: Mounted from library/ubuntu
be96a3f634de: Mounted from library/ubuntu
v1.0: digest: sha256:0a6b502991a85dfa697b8ae87f8673db651d46a075e3ea8b98be55f310a3daf9 size: 1781
build - push 한다.
<Programmer - Ubuntu에서>
onbuild 디렉터리를 만든 뒤 들어가고, website.tar 파일을 넣는다.
vi Dockerfile
FROM hyun141/web-base:v1.0root@ubuntu-node02:~/onbuild# docker build -t hyun141/web-site:v1.0 .
Sending build context to Docker daemon 6.851MB
Step 1/1 : FROM hyun141/web-base:v1.0
v1.0: Pulling from hyun141/web-base
58690f9b18fc: Pull complete
b51569e7c507: Pull complete
da8ef40b9eca: Pull complete
fb15d46c38dc: Pull complete
e3ab3c698320: Pull complete
badef6e251f5: Pull complete
8b21d21d802d: Pull complete
Digest: sha256:0a6b502991a85dfa697b8ae87f8673db651d46a075e3ea8b98be55f310a3daf9
Status: Downloaded newer image for hyun141/web-base:v1.0
# Executing 1 build trigger
---> 7172620e05d4
Successfully built 7172620e05d4
Successfully tagged hyun141/web-site:v1.0
root@ubuntu-node02:~/onbuild# docker run -d -p 80:80 --name web-site hyun141/web-site:v1.0
ab38406c9b7fcaf5a72263cfd04d146cc28a890f4ce1be84176f4f223a46f10ebuild 후 run 한다.

우분투의 ip 주소로 들어가본다.
push 하기 위해, 우분투에서 도커 허브에 로그인을 한다.
root@ubuntu-node02:~/onbuild# docker login
Login with your Docker ID to push and pull images from Docker Hub. If you don't have a Docker ID, head over to https://hub.docker.com to create one.
Username: hyun141
Password:
WARNING! Your password will be stored unencrypted in /root/.docker/config.json.
Configure a credential helper to remove this warning. See
https://docs.docker.com/engine/reference/commandline/login/#credentials-store
로그인 후 리스트를 보면, .docker라는 숨겨진 디렉터리가 생성된 것을 볼 수 있다.
여기엔 로그인 정보가 들어있으므로, VM이 껐다 켜져도 로그인 상태가 유지된다.
root@ubuntu-node02:~/onbuild# docker push hyun141/web-site:v1.0
The push refers to repository [docker.io/hyun141/web-site]
715abe548807: Pushed
d4fe60f34be0: Mounted from hyun141/web-base
f48128be92a0: Mounted from hyun141/web-base
ee14f35430fd: Mounted from hyun141/web-base
1251204ef8fc: Mounted from hyun141/web-base
47ef83afae74: Mounted from hyun141/web-base
df54c846128d: Mounted from hyun141/web-base
be96a3f634de: Mounted from hyun141/web-base
v1.0: digest: sha256:acd9341d73fd5e663ffb85f3830a6370c39aa75ae081b7b312dd26928941976c size: 1992
푸시한다.
AWS 에서
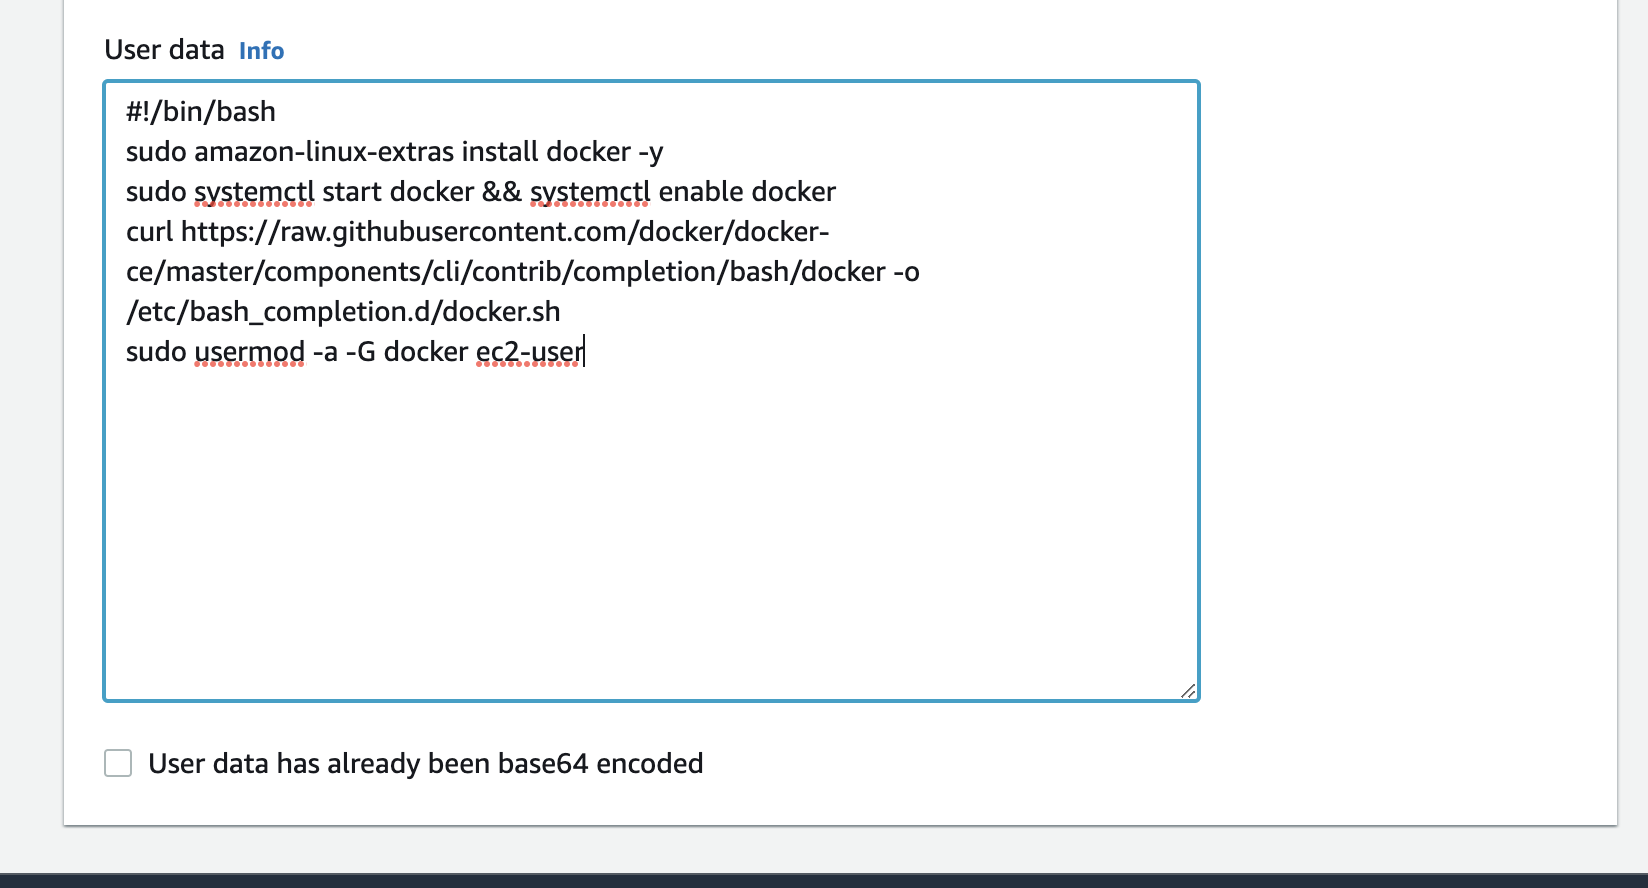
AWS - EC2 에서 인스턴스를 생성한다.

Route53으로 들어간다.

저번에 만든 도메인 네임 클릭 - 새로운 레코드 생성한다.

방금 만든 docker 인스턴스의 ip를 입력한다.
그리고 이를 이용해서 터미널에 접속한다.
[ec2-user@ip-10-29-13-51 ~]$ docker --version
Docker version 20.10.13, build a224086
[ec2-user@ip-10-29-13-51 ~]$ docker run -d -p 80:80 --name webserver hyun141/web-site:v1.0
Unable to find image 'hyun141/web-site:v1.0' locally
v1.0: Pulling from hyun141/web-site
58690f9b18fc: Pull complete
b51569e7c507: Pull complete
da8ef40b9eca: Pull complete
fb15d46c38dc: Pull complete
e3ab3c698320: Pull complete
badef6e251f5: Pull complete
8b21d21d802d: Pull complete
ba7845adafeb: Pull complete
Digest: sha256:acd9341d73fd5e663ffb85f3830a6370c39aa75ae081b7b312dd26928941976c
Status: Downloaded newer image for hyun141/web-site:v1.0
8394be7804b884cf989b4a0aae531183f21350e15203d1133194e353ed9c186f
[ec2-user@ip-10-29-13-51 ~]$ docker ps
CONTAINER ID   IMAGE                   COMMAND                  CREATED         STATUS         PORTS                               NAMES
8394be7804b8   hyun141/web-site:v1.0   "nginx -g 'daemon of…"   4 minutes ago   Up 4 minutes   0.0.0.0:80->80/tcp, :::80->80/tcp   webserver
웹브라우저에서 접속해본다.

Restart의 의미
[root@localhost onbuild]# docker run -d -p 8888:80 --restart always --name test-restart hyun141/web-site:v1.0
Unable to find image 'hyun141/web-site:v1.0' locally
v1.0: Pulling from hyun141/web-site
58690f9b18fc: Already exists
b51569e7c507: Already exists
da8ef40b9eca: Already exists
fb15d46c38dc: Already exists
e3ab3c698320: Already exists
badef6e251f5: Already exists
8b21d21d802d: Already exists
ba7845adafeb: Pull complete
Digest: sha256:acd9341d73fd5e663ffb85f3830a6370c39aa75ae081b7b312dd26928941976c
Status: Downloaded newer image for hyun141/web-site:v1.0
09f1a1e00493965bc836ac8e4b54c8e6220dfad015793a550c7e243f3968d054
[root@localhost onbuild]# docker ps
CONTAINER ID   IMAGE                    COMMAND                  CREATED          STATUS          PORTS                                       NAMES
09f1a1e00493   hyun141/web-site:v1.0    "nginx -g 'daemon of…"   17 seconds ago   Up 16 seconds   0.0.0.0:8888->80/tcp, :::8888->80/tcp       test-restart
5b07e940c957   centos:7                 "/bin/bash"              2 hours ago      Up 2 hours                                                  bm-test
c0d0d20985b3   hyun141/wordpress:v1.0   "/bin/sh -c 'httpd -…"   3 hours ago      Up 3 hours      0.0.0.0:88->80/tcp, :::88->80/tcp           wordpress
e52079ba1024   mariadb                  "docker-entrypoint.s…"   3 hours ago      Up 3 hours      0.0.0.0:3306->3306/tcp, :::3306->3306/tcp   dbserver
운영자의 ip로 접속해본다.
VM을 껐다 켜 본다.
[root@localhost ~]# docker ps
CONTAINER ID   IMAGE                   COMMAND                  CREATED         STATUS          PORTS                                   NAMES
09f1a1e00493   hyun141/web-site:v1.0   "nginx -g 'daemon of…"   3 minutes ago   Up 21 seconds   0.0.0.0:8888->80/tcp, :::8888->80/tcp   test-restart
다시 ps 해봐도 always 를 했기 때문에 컨테이너가 죽지 않고 살아있게 된다.
이 옵션을 이용하여 사설 레지스트리를 만든다.
[ec2-user@ip-10-29-13-51 ~]$ docker run -d -p 5000:5000 --restart always --name private-docker-registry registry
Unable to find image 'registry:latest' locally
latest: Pulling from library/registry
2408cc74d12b: Pull complete
ea60b727a1ce: Pull complete
c87369050336: Pull complete
e69d20d3dd20: Pull complete
fc30d7061437: Pull complete
Digest: sha256:bedef0f1d248508fe0a16d2cacea1d2e68e899b2220e2258f1b604e1f327d475
Status: Downloaded newer image for registry:latest
b5202f839b6e13e3e137eea0e54a18149202852524f7c470ba1370261029387f
registry: 저장소 서버
퍼블릭 클라우드에서 레지스트리를 만들게 되면, 광범위하게 사용할 수 있다.
도커의 registry를 이용하여 저장공간을 만든다. -> 도커 사설 레지스트리를 만든다.
CentOS에서 daemon.json 파일을 만든다.
vi /etc/docker/daemon.json - 클라이언트에 필요한 보안 설정
{ "insecure-registries":["docker.cloudywinter.shop:5000"] }systemctl restart docker그리고 AWS EC2- 보안 그룹으로 들어간다.

아까 전에 만들었던 보안 그룹 MY-SG-WEB - 인바운드 규칙을 수정한다.

Custom TCP - 포트번호 5000을 추가한다.
[root@localhost ~]# docker tag hyun141/homepage:v1.0 docker.cloudywinter.shop:5000/homepage:v1.0
[root@localhost ~]# docker push docker.cloudywinter.shop:5000/homepage:v1.0
The push refers to repository [docker.cloudywinter.shop:5000/homepage]
c563832507c0: Pushed
e7344f8a29a3: Pushed
44193d3f4ea2: Pushed
41451f050aa8: Pushed
b2f82de68e0d: Pushed
d5b40e80384b: Pushed
08249ce7456a: Pushed
v1.0: digest: sha256:01a51eadbfb52ada5b9d6a5b5bbfcc6867a7085273736389c5eb06004f24c38d size: 1780
올렸다
repository에 잘 올라갔는지 확인하기 위해 ubuntu에서 확인해 본다.
vi /etc/docker/daemon.json - 똑같이 해 준다.
{ "insecure-registries":["docker.cloudywinter.shop:5000"] }systemctl restart docker이 과정을 생략하면 HTTP HTTPS ... 오류가 발생한다.
root@ubuntu-node02:~/onbuild# docker run -d -p 8888:80 --name test docker.cloudywinter.shop:5000/homepage:v1.0
Unable to find image 'docker.cloudywinter.shop:5000/homepage:v1.0' locally
v1.0: Pulling from homepage
b85a868b505f: Pull complete
f4407ba1f103: Pull complete
4a7307612456: Pull complete
935cecace2a0: Pull complete
8f46223e4234: Pull complete
fe0ef4c895f5: Pull complete
f623841c39e7: Pull complete
Digest: sha256:01a51eadbfb52ada5b9d6a5b5bbfcc6867a7085273736389c5eb06004f24c38d
Status: Downloaded newer image for docker.cloudywinter.shop:5000/homepage:v1.0
c9c8b0f08ac0d3022b157aa9657482478a490f8835a5615b8256bb1da718ed8c
주로 폐쇄망에서 활용할 때 사용한다.